Plumbing a washing machine may seem like a complex task, but with some basic tools and a step-by-step approach, most homeowners can do it themselves. Whether you’re installing a washer in a new laundry room or replacing an old unit, proper plumbing ensures clean water supply, effective drainage, and peace of mind.
Tools and Materials You’ll Need
Before you begin, gather these essential tools and components:
- Washing machine
- Flexible hot and cold water supply hoses
- Water supply valves (if not already installed)
- Pipe wrench or adjustable wrench
- Teflon tape
- Washing machine drain hose
- Drain standpipe or utility sink
- Hose clamps
- Level
- PEX, CPVC, or copper pipe (for new supply lines)
- Pipe cutter and fittings (if extending plumbing)
See also: Home Staging Services to Maximize Your Home’s Market Appeal
Step 1: Choose the Right Location
Ideally, your washing machine should be located near existing water supply lines and a drain. Common placement includes:
- Laundry room
- Basement
- Utility room
- Bathroom closet (in smaller homes)
Ensure the area is level, well-ventilated, and near a 120V electrical outlet. Avoid placing the washer on uneven floors or near heat sources.
Step 2: Install or Verify Water Supply Lines
Most washing machines require both hot and cold water connections. If the hookups already exist, inspect the shutoff valves for leaks or corrosion. Replace old or worn valves with new ones if needed.
If no supply lines are available, you’ll need to run new lines from your home’s main water supply using PEX, copper, or CPVC. Secure them to the wall studs with pipe straps, and install shutoff valves about 36 to 42 inches above the floor for easy access.
Wrap Teflon tape around the threads and screw the valves tightly onto the pipe fittings.
Step 3: Install a Drainage System
Washing machines produce a high flow of wastewater that must be drained quickly and securely. You have two common options:
1. Standpipe Drain:
- A vertical standpipe (usually 2 inches in diameter) connects to the home’s main drain.
- It should be at least 18–30 inches tall and vented to prevent siphoning.
- The washer’s drain hose is inserted into the standpipe and secured with a hose clamp.
2. Utility Sink:
- The washer drains into a deep utility sink, which is then connected to the home’s plumbing.
- This is easier to maintain and reduces the risk of overflows.
Ensure the drain pipe has a trap (P-trap) and proper slope for effective drainage. If installing a new drain line, follow local building codes.
Step 4: Position the Washing Machine
Carefully slide the washing machine into position, allowing access to the back for hose connections. Use a level to ensure the appliance sits evenly on all sides. Adjust the feet as needed to avoid excess vibration during use.
Do not tilt the machine too far, as internal components may shift. Leave about 4–6 inches of clearance between the washer and wall for hoses and airflow.
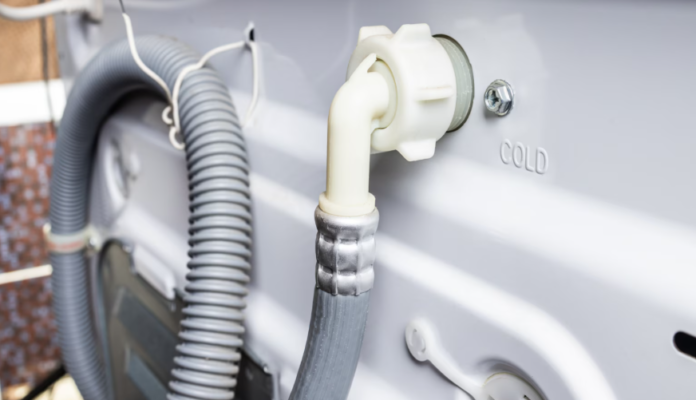
Step 5: Connect the Water Supply Hoses
Attach the hot and cold water hoses to the washer’s inlets and corresponding shutoff valves:
- Use red for hot and blue for cold (though color is optional).
- Apply Teflon tape to the threads of each connection.
- Hand-tighten first, then give an extra turn with a wrench to ensure a secure fit—don’t overtighten.
Turn on the water valves and inspect for leaks at both ends. If leaking occurs, tighten slightly or replace washers inside the hose fittings.
Step 6: Connect the Drain Hose
Attach the washer’s drain hose to the standpipe or utility sink:
- Insert the hose no more than 6–8 inches into the standpipe to avoid siphoning.
- Secure the hose with a clamp or zip tie to prevent it from dislodging during operation.
If draining into a sink, ensure the hose loops upward before entering the sink to act as an air gap and prevent backflow.
Step 7: Plug in and Test the System
Plug the washing machine into a grounded 120V outlet. Run a test cycle (such as “Quick Wash”) to ensure:
- Water fills properly from both hot and cold lines.
- The washer agitates and spins without excess noise or vibration.
- Wastewater drains efficiently and does not leak or overflow.
- All hose connections remain dry under pressure.
Address any leaks immediately by turning off the water supply and retightening or replacing connections.
Maintenance Tips for Long-Term Reliability
- Check hoses annually: Replace rubber hoses every 3–5 years to prevent bursting. Braided stainless steel hoses are more durable.
- Clean filters: Most machines have small inlet screens that can clog over time. Remove and rinse them occasionally.
- Level the machine: An unbalanced washer can damage internal parts and flooring.
- Flush the drain: Pour a mixture of hot water and baking soda into the standpipe every few months to prevent clogs.
When to Call a Professional
You should hire a plumber if:
- There’s no existing drain or water line and full rough-in plumbing is needed.
- You need to install a washing machine on an upper floor with new venting and drainage.
- You encounter leaks or pressure issues in the water supply.
- Your home’s plumbing system is outdated or lacks proper capacity.
Professionals ensure code compliance, safety, and long-term performance.
Conclusion
Plumbing a washing machine in Plainfield is an achievable DIY task for most homeowners with basic plumbing experience. A secure setup with proper water supply and drainage is crucial to avoid leaks, water damage, and inefficient performance. Whether you’re setting up a new laundry space or replacing an old washer, following these steps ensures a clean and efficient result.


